
You have the option to adjust the location of the wishlist button according to your liking through a series of easy steps outlined below. This affords you the flexibility to tailor the button’s placement on your website to better align with your preferences and design choices.
Case 01: Through Custom code #
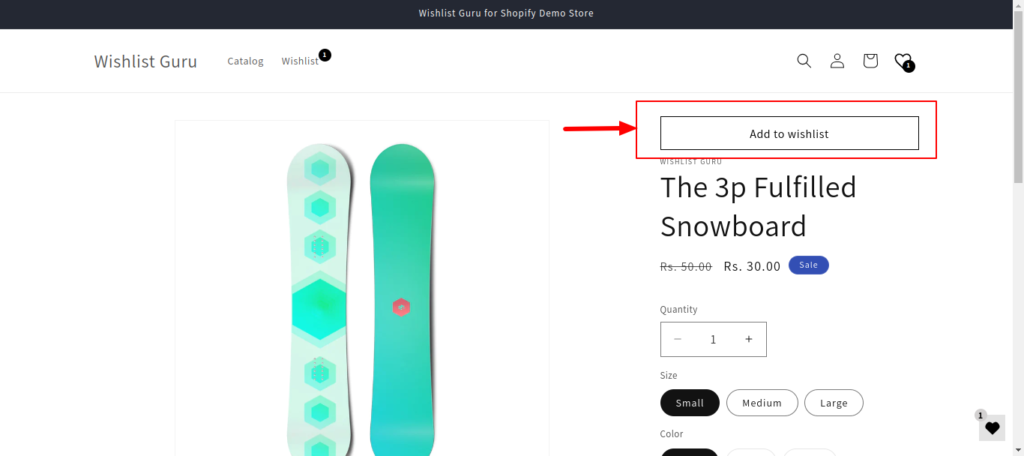
By utilizing custom code, you can strategically position the “Add to Wishlist Button” wherever it suits your needs, whether it be on the home page, collection page, or elsewhere. In this guide, we’ll focus on placing the wishlist button on the product page. Follow these steps to achieve the desired placement:
Step 01: Begin by navigating to the Shopify Admin Console and accessing Online Store > Themes > Edit Code.
Step 02: Locate the files associated with your product template by searching for “product.json” in the designated search area. Identify the section name created in your product template which is “main-product” in this theme.
Step 03: Now you just have to add the below code at the desired location wherever you want to show your button with slight modification.
<div class=”wf-wishlist-button” data-productID=”{{ product.id }}” producthandle=”{{ product.handle }}” ></div>
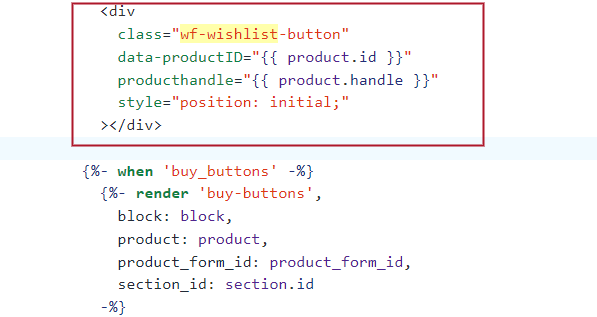
Note*- Depending on your theme, the data-productID may vary. Adjust the code accordingly to ensure compatibility. If your theme’s data-productID is different, replace it accordingly. As in our case data-productID is product.id
So we have to put the code as: <div class=”wf-wishlist-button” data-productID=”{{ product.id }}” producthandle=”{{ product.handle }}” ></div>
Congratulations! Your wishlist button is now positioned exactly where you want it to be.
Case 02: By adding a block #
Follow the steps to add wishlist button to your product page.
Step 01: Navigate to your online store and click on ‘Customize’ followed by ‘Sections’.
Step 02: Choose the template in which you want to change the position, then locate the ‘wishlist button’ block.
Step 03: Now, the fun part! Simply drag the block to your desired spot on the page, ensuring it seamlessly integrates with your design aesthetic.
By following these steps, you can effortlessly incorporate the wishlist button into your product page design using a block. For more detailed instructions on utilizing blocks to place a wishlist button, refer to additional resources.


