
To show the wishlist button on the product page we have the following two options:
- Through App Settings
- By using the Custom Code
Through App Settings #
By default we are auto injecting Add to Wishlist button on Product detail page below Buy buttons, In case you want to rearrange position or button doesn’t show on your product detail page then please configure Manually.
If you decide to configure it manually, please follow the instructions carefully.
Step 01: Navigate to Online Store > Customize
To enable the wishlist button on the template of your choice click on the template button as shown in the image below which is marked as 1
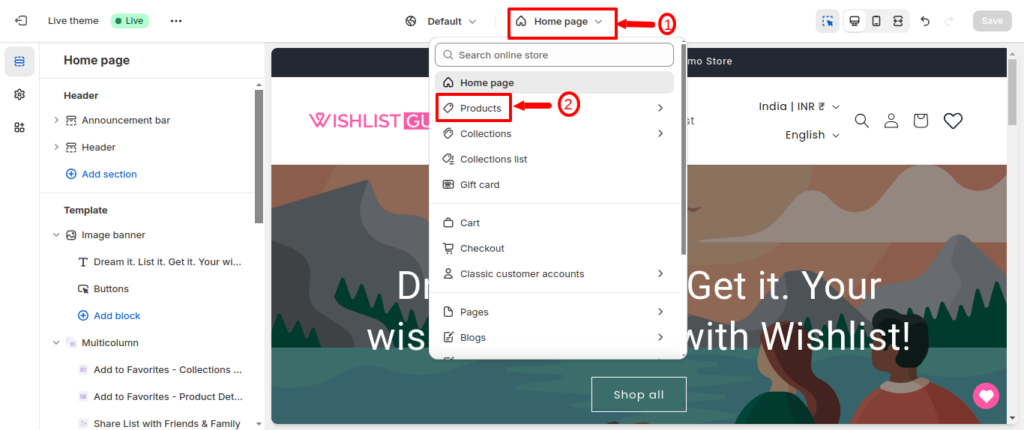
A list of templates for your store will be shown to you. From these templates, you can choose the template of your choice ( for now we are choosing the Products template) which is marked as 2 in the image.
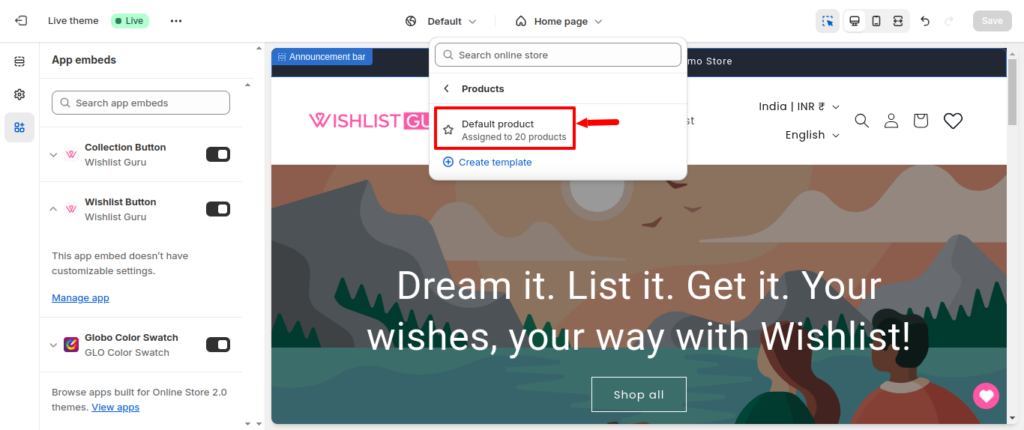
Note*- Don’t forget to toggle “ON” the Wishlist button from the app embeds section otherwise your wishlist button or icons are not visible.
Step 02: You will be taken to the page as shown in the image below. Click on the Default product to show buttons on your products in your default product template.
Step 03: To add a block, click on the section button as shown in the image below
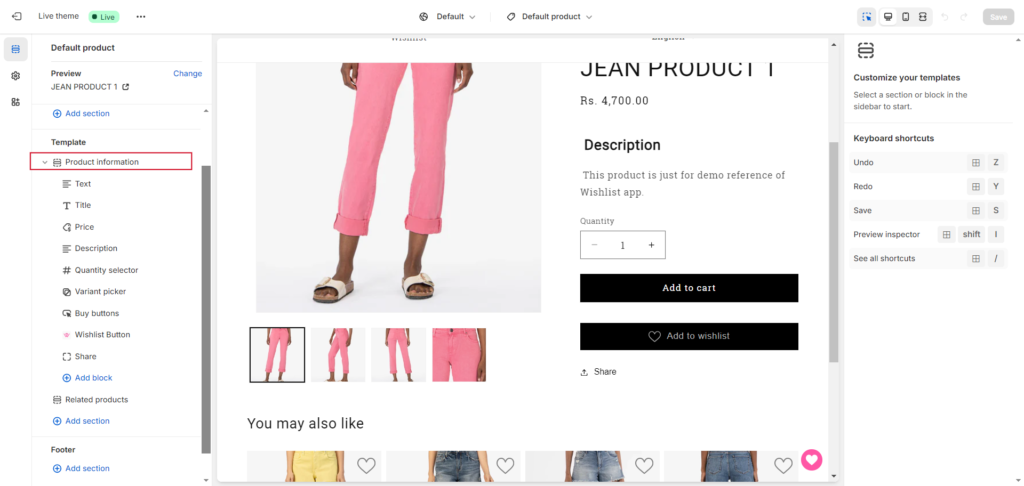
Now your options will appear like this as shown in the image below:
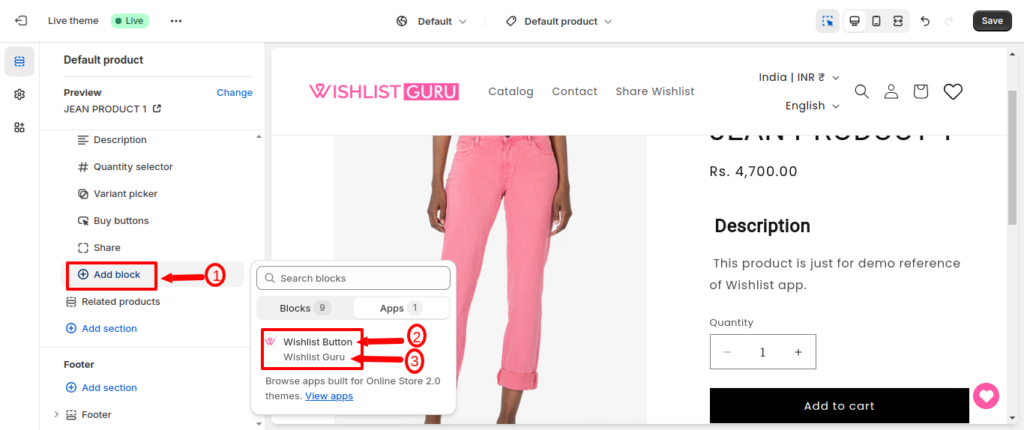
Click on the Add block button as in the image above and then scroll down a little bit to find the name of your button as shown in point 2, also you have to check the name of your app from where this button ( wishlist button ) is coming as shown in point 3.
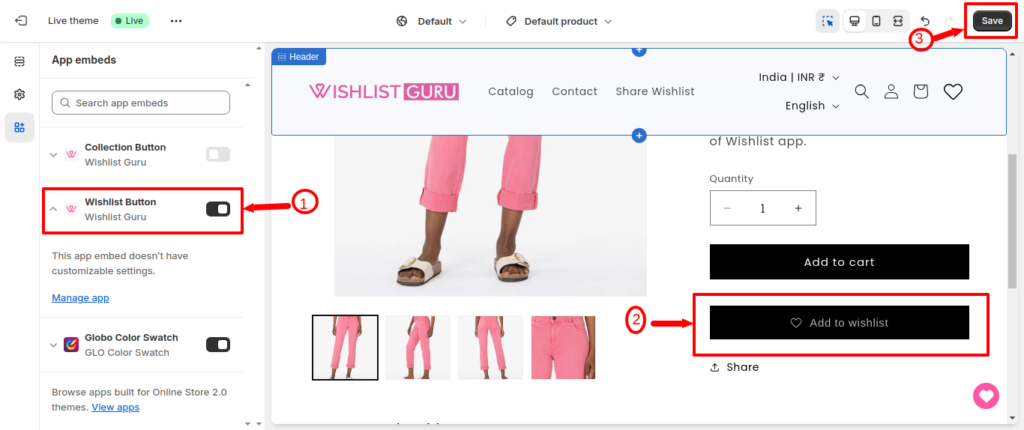
Step 04: Finalize your wishlist button
Here as shown in the image below you now have your wishlist button block as marked in point 1 and your button will appear as marked in point 2. At last, you have to click on the Save button as marked at point 3 to finally add the wishlist button to your product page.
By using the Custom Code (Available in the upgrade plan) #
You can also add a wishlist button using a custom code. To do that you can easily follow the steps given below:
Step 01: Navigate to the Shopify Admin Console and click Online Store > Themes > Edit Code.
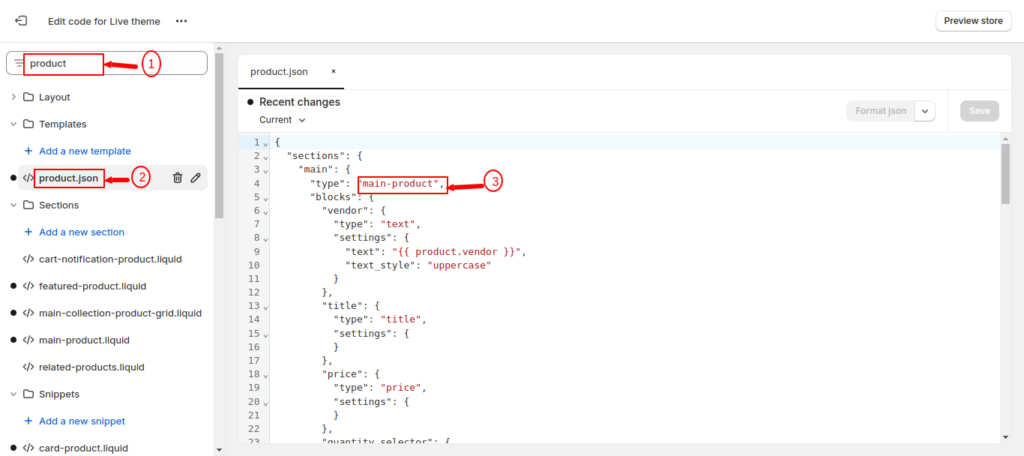
Step 2: Search your product file using the search box, indicated by the number 1 in the image below. Then, navigate to the product.json file, marked as number 2 in the image.
Once in the product.json file, search for the section corresponding to the one used in your product template. In this case, it is identified as “main-product” as shown in the image indicated as number 3.
Afterward, search for your section file (as shown in the image below marked as 1), which in our case is “main-product.liquid” (marked as no 2 in the image below) Within this section file, choose the location where you want to add your wishlist button to your product page. In our case, we have added the code to the top of the product information ” (marked as no 3 in the image below).
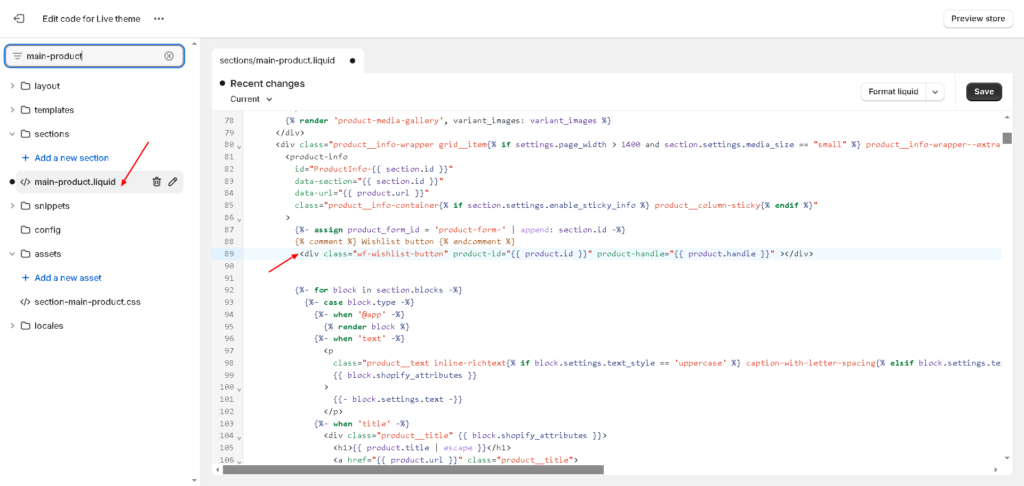
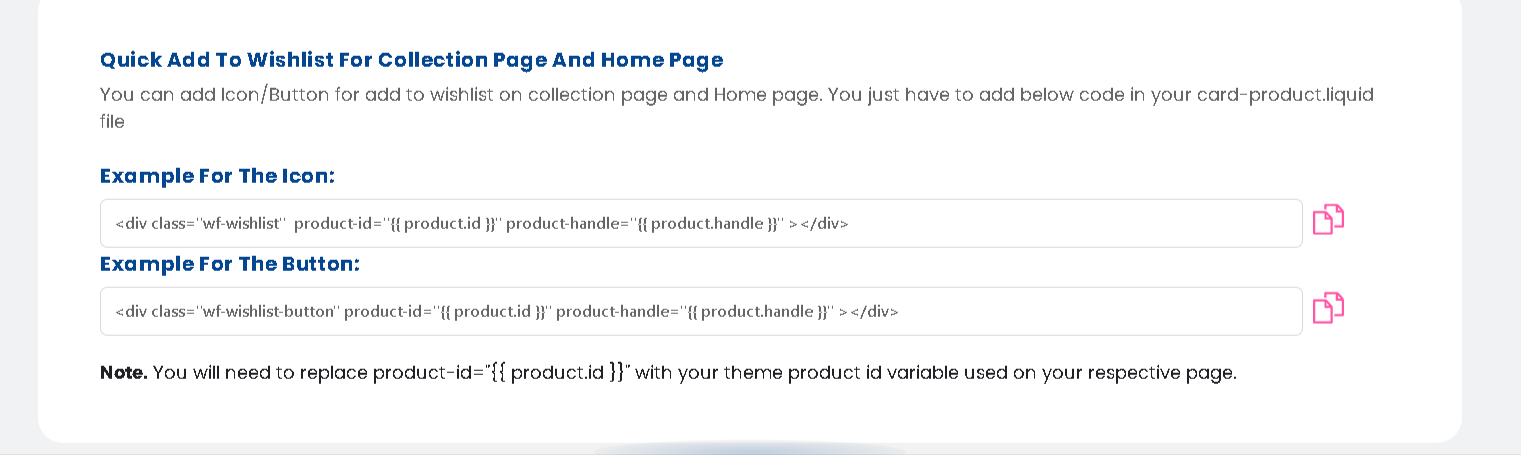
Custom code for the Button: <div class=”wf-wishlist-button” product-id=”{{ product.id }}” product-handle=”{{ product.handle }}” ></div>
Note*- Depending on your theme you might have to modify the above code slightly. As data-productID is different in different themes. So in place of card_product.id you put your Product ID.
Note*- Don’t forget to save your settings after adding these codes to your files also don’t forget to toggle “On” the wishlist button otherwise your icon and button are not visible.
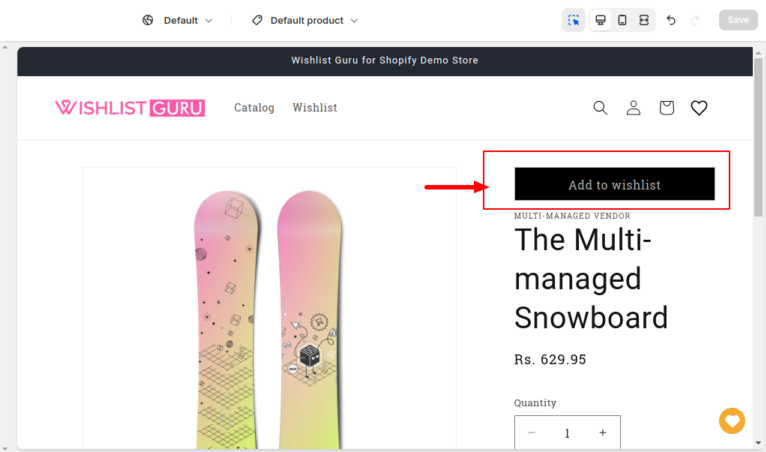
Congratulations! Your wishlist button is positioned exactly where you want it to be on your product page.


