
Step into the world of Wishlist Guru by seamlessly integrating it into your Shopify development theme for comprehensive testing before the grand reveal of your main theme. To begin this journey, follow the following fundamental steps:
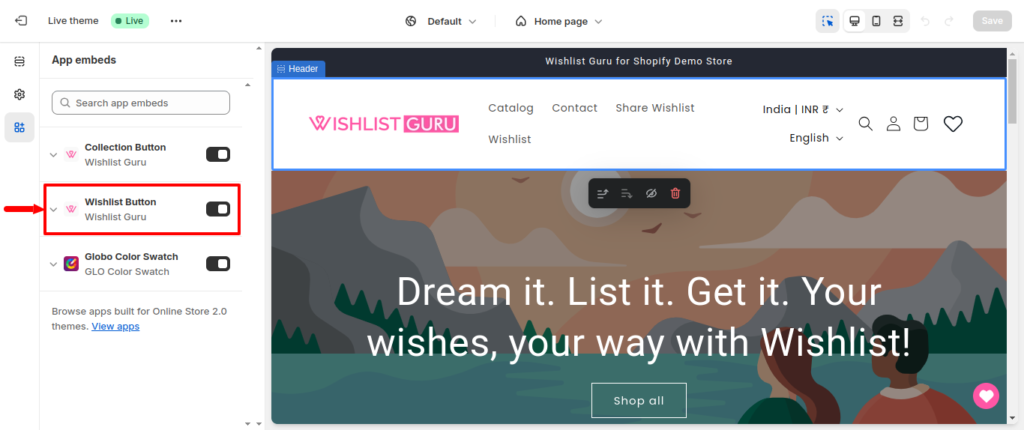
How to disable Wishlist on your live theme #
To disable the app on your theme go to the Online store > Click on Customize (Live/Published theme).
Now click on the “App Embeds” and then toggle the Wishlist button to “off” and then press the Save button (located in the top right corner). Congratulations! your app has been successfully disabled on your desired theme.
Installing Wishlist Guru on the copy of your live theme (Duplicate Theme) #
Step 01: Install Wishlist Guru on your Store.
Step 02: If you have Enabled app on your live theme then you can Disable the app on your live theme to make sure while you are testing things out it doesn’t show results to your live audience.
Step 03: Safeguard your main theme by creating a duplicate theme. This essential step ensures that your testing environment remains isolated, allowing you to explore and fine-tune the Wishlist Guru features with confidence.
To create a duplicate theme go to Online Store > Click on three dots of your current theme > Click on Duplicate.
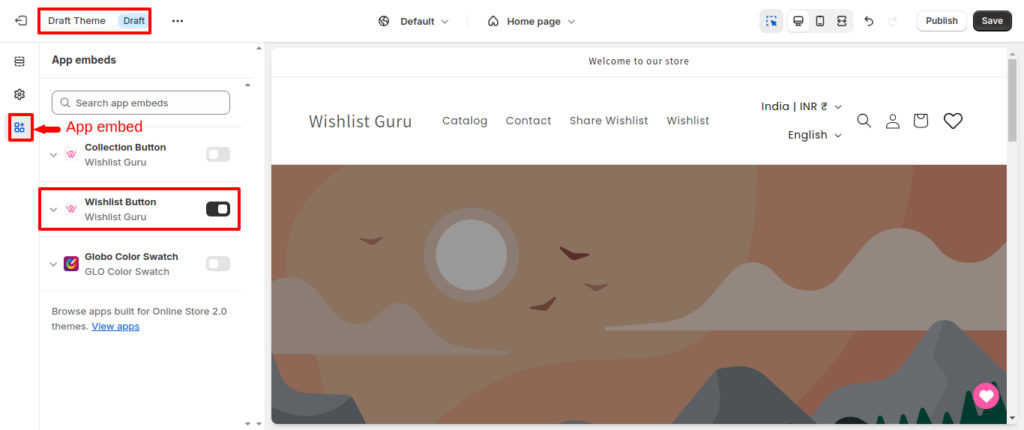
Step 04: Now go to copy of your live theme and then click on customize for duplicate theme

Step 05: Click on the “App Embeds and check whether the Wishlist button toggle is “On”. If it is not in the “On” condition then click on it to toggle it to the “On” condition and then press the Save button. Congratulations! your app has been successfully installed on your dev theme.
Manual Setup Instructions for any theme #
If you’re looking to integrate the Wishlist Guru app into a fresh theme, such as one obtained from the Shopify theme store or a development theme you’ve been working on before incorporating Wishlist Guru, then follow these steps:
Step 01: If Wishlist Guru hasn’t been installed yet, make sure to install it on your Shopify store using the Shopify App Store.
Step 02: If Wishlist Guru is already enabled on your active theme, you may choose to disable it temporarily.
Step 03: Transfer the required files from your current theme to the new theme.
To transfer files from the current theme to another theme, adhere to the following steps:
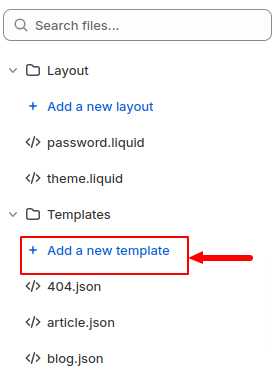
- Navigate to “Online store” and select “Edit code” by clicking on the three dots option.
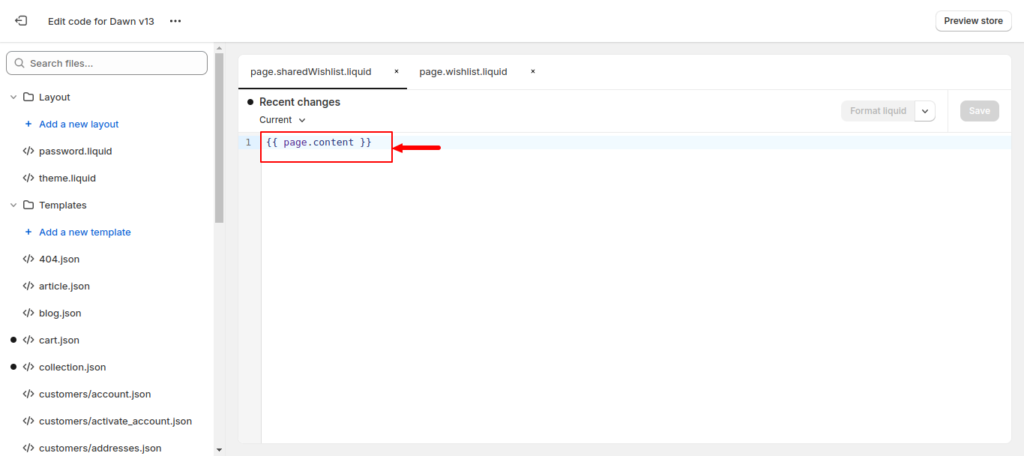
- Within the “Template” section, create two new template files by clicking on the “Add a new template” named “page.sharedWishlist.liquid” and “page.wishlist.liquid”.
- Inside both files, insert the code: {{ page.content }}
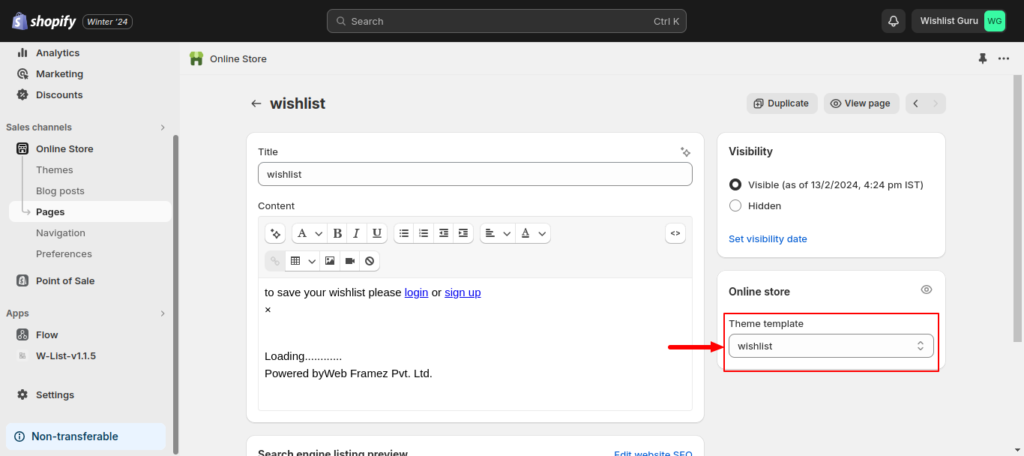
- Your templates should automatically be assigned to your theme. If not, proceed to the “Online store” section and access the “Pages” option. Locate two pages named “wishlist” and “shared wishlist”.
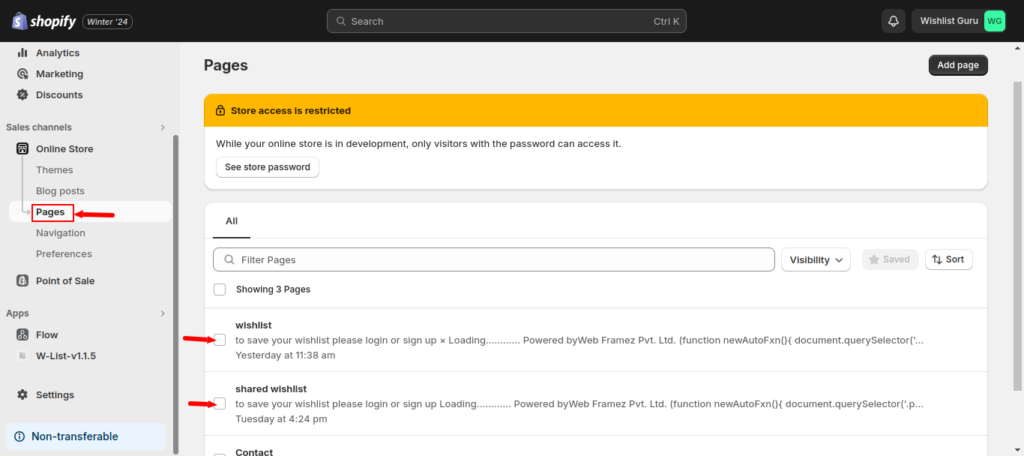
For both pages, select the corresponding theme template: “wishlist” for the “wishlist” page and “shared wishlist” for the “shared wishlist” page. With these steps completed, your file transfer process is finalized.
Step 04: Now go to your theme where you want to install the app and then click on customize.
Step 05: Click on the “App Embeds and check whether the Wishlist button toggle is “On”. If it is not in the “On” condition then click on it to toggle it to the “On” condition and then press the Save button (located in the top right corner). Congratulations! your app has been successfully installed on your desired theme.


