
Table of Contents
The ‘Add to Wishlist’ button is positioned below the Add to Cart button on the product details page.
Incorporating a Wishlist button on your product details pages enables shoppers to bookmark their favourite items while browsing. This feature allows them to easily pick up where they left off. It enhances user engagement and increases the chances of conversion, as adding products to a wishlist demonstrates genuine interest, making it more likely for customers to return and make a purchase.
Step 1: Open Shopify Theme Editor #
- Log in to your Shopify Admin.
- Navigate to Online Store > Themes.
- Click Edit code on your active theme.
- Search for the main-product.liquid section file.
Find the code to the position of your preference and add the copied code right below it. In this example, we are placing the button before the Title element.
Example for the Icon:
<div class="wf-wishlist"  product-id="{{ product.id }}" product-handle="{{ product.handle }}" ></div>


Example for the Button:
<div class="wf-wishlist-button" product-id="{{ product.id }}" product-handle="{{ product.handle }}" ></div>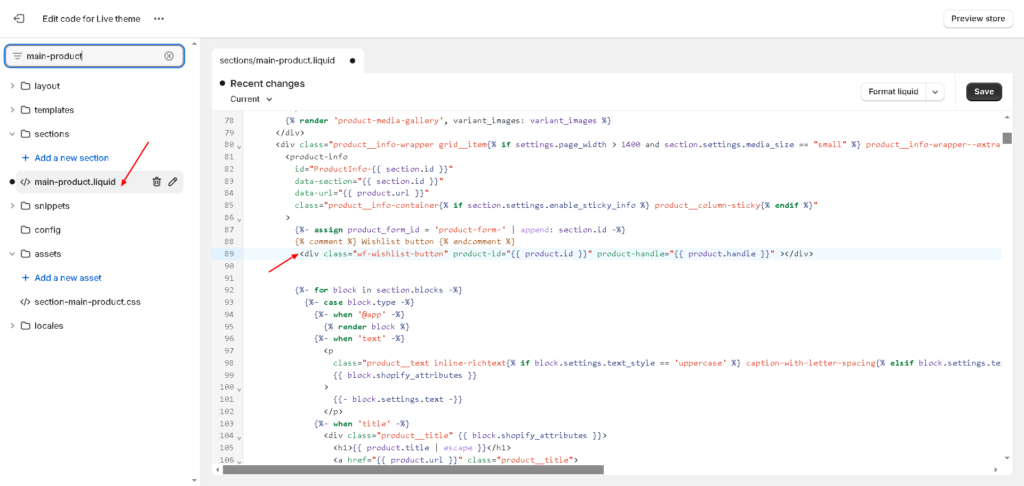
You can implement this code wherever it best fits your website’s theme. After attaching the button, use CSS to style and align it as needed.


