
To add a wishlist icon to your header menu you can follow the instructions given below.
How to Enable it: #
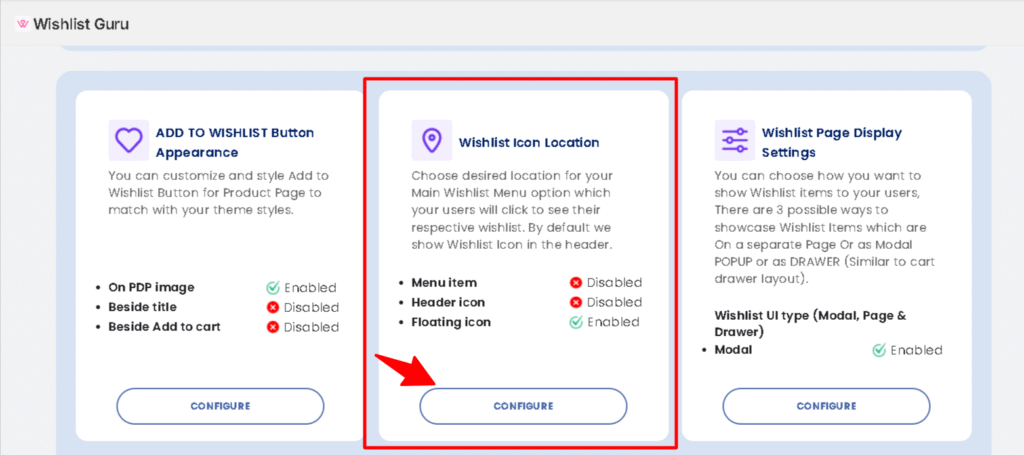
- Go to Dashboard
- Scroll below you will find section Wishlist Icon Location, see below
- Click on Configured
You will be directed to the section as shown in the image below of the General Settings page.
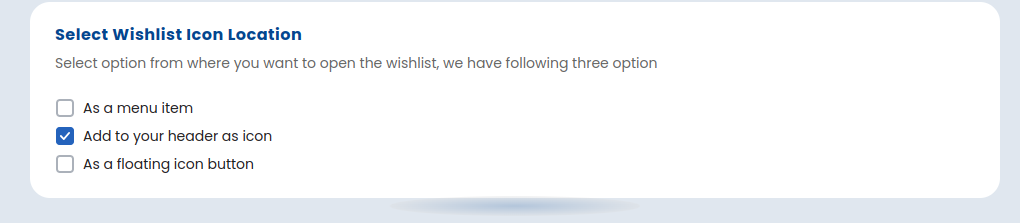
Within this section, select the option marked as an “Add to your header as icon”. This ensures that the Wishlist icon will be displayed on the header.
Save settings after configuring the Wishlist display options by clicking on the “Save” button ( located in the top right corner ) to apply the changes. Congratulations! your Wishlist will now be accessible from the header icon.
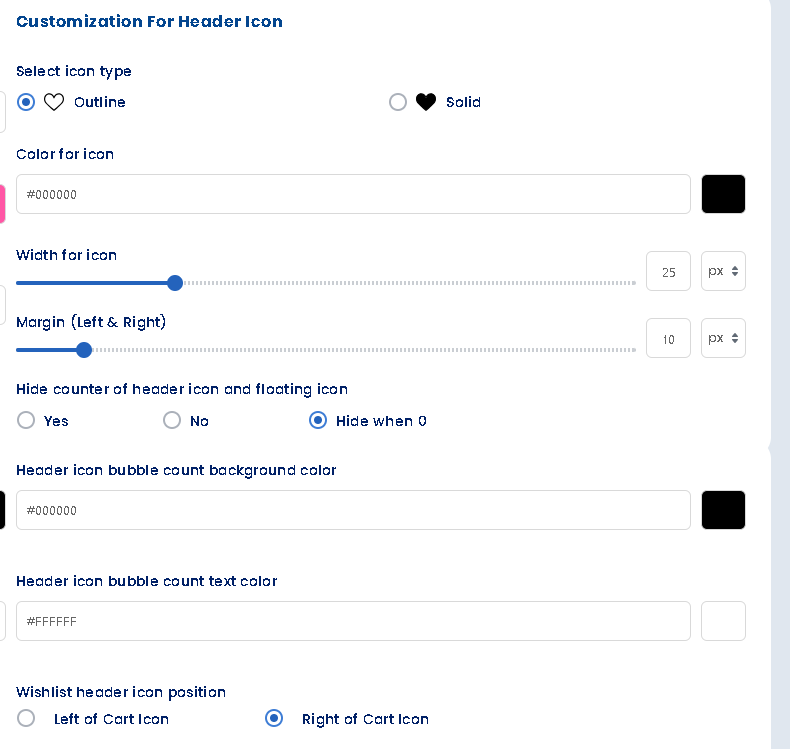
Customization for header icon
According to your theme, you can do various customization like :
1. Select Icon Type
Choose between outline or solid heart icon style.
2. Color for Icon
Set the heart icon color using a hex code.
3. Width for Icon
Define the icon’s width in pixels.
4. Margin (Left & Right)
Set horizontal spacing around the icon.
5. Hide Counter of Header & Floating Icon
Toggle to show or hide the wishlist item count badge.
6. Header Icon Bubble Count Background Color
Set the background color for the count bubble.
7. Header Icon Bubble Count Text Color
Set the text color inside the count bubble.
8. Wishlist Header Icon Position
Choose the icon’s position relative to the cart or hide it.
9. Hide counter of header icon and floating icon
If you want to hide the wishlist item count, we provide an option
Add wishlist header icon using custom code in the theme file: Learn here


