
With Wishlist Guru, you can enable this feature either through built-in app settings (available on Basic plans and above) or by using custom code for more advanced customization. This guide covers both methods, allowing you to choose between a quick setup or a more flexible implementation.
If you prefer to display the wishlist icon on product images or specific areas within collection pages, custom code gives you complete control. And if you need assistance, our support team is always available to help.
Ways to Add Wishlist Icon on Collection Page: #
Method 1: Icon (only) through App settings #
Note* : This method only works with the paid plan basic and above
To enable the Collection extension/button, please follow the steps below:
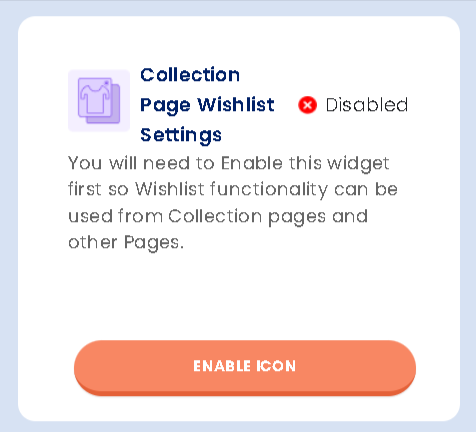
- Go To App Dashboard
- Scroll below, you will see the Collection Page Wishlist Setting
- Click on the Enable icon
After that, click on the Enable button, and you will be taken to the page where all the settings related to the Collection page wishlist settings are located, as shown in the image below:
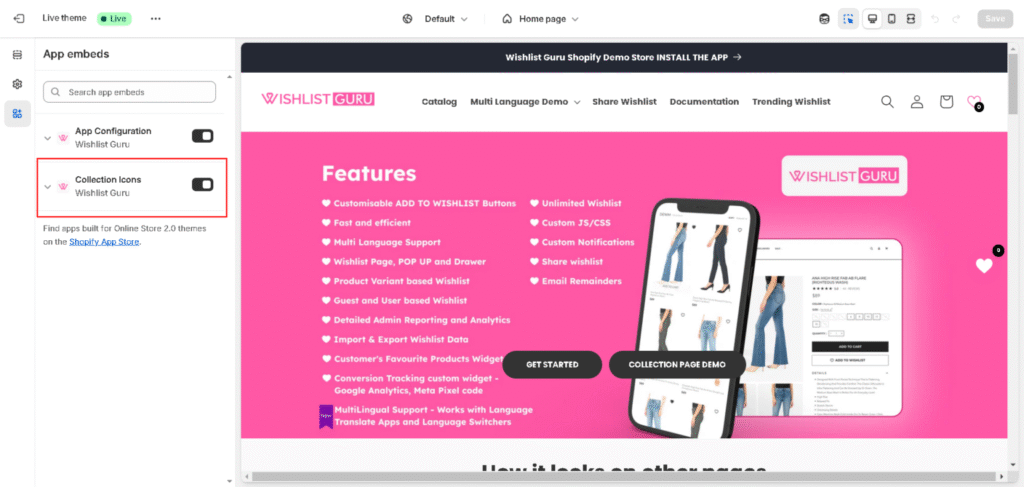
Now just click on the save button to save your settings, and you are done adding the wishlist icon to your collection page.
Method 2: Through Custom code #
Step 01: Navigate to the Shopify Admin and go to Online Store > Themes > Edit Code.
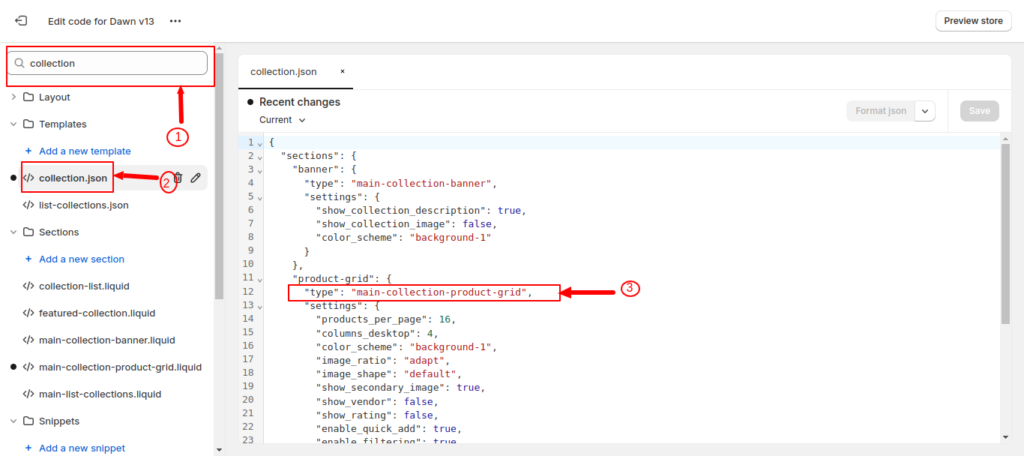
Step 02: Search your collection file using the search box, indicated by the number 1 in the image below. Then, navigate to the collection.json file, marked as number 2 in the image.
Once in the collection.json file, search for the section corresponding to the one used in your collection template. In this case, it is identified as “main-collection-product-grid” as shown in the image indicated as number 3.
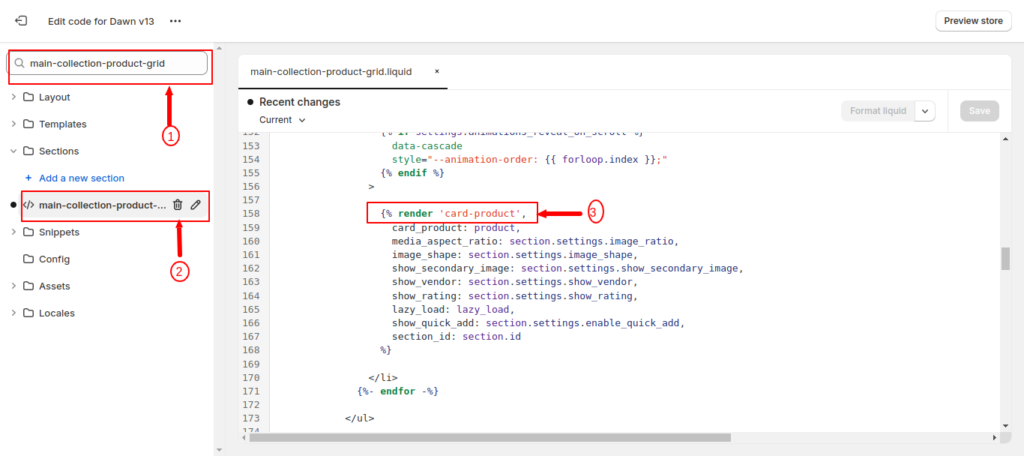
Afterward, search for your section file (as shown in the image below marked as 1), which in our case is “main-collection-product-grid.liquid” (marked as no 2 in the image below) Within this section file, identify the snippets responsible for rendering your products on the collection page. In our case, the snippet is named “card-product” (marked as no 3 in the image below).
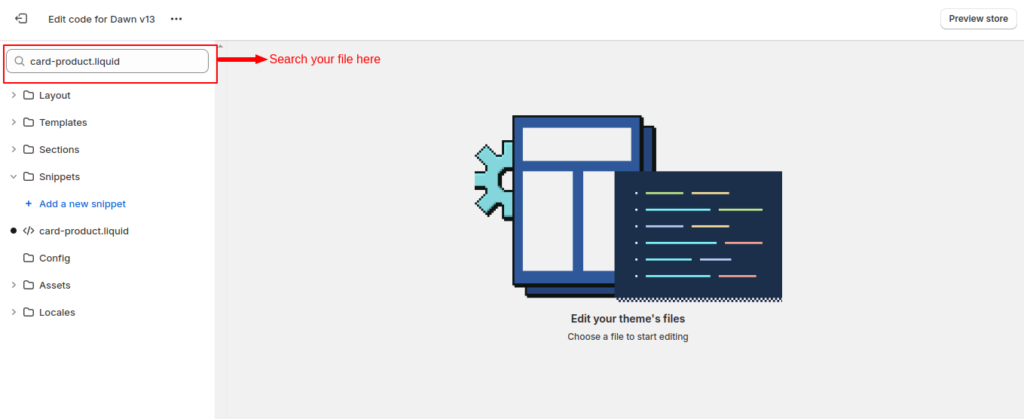
Step 03: Search for the card-product.liquid snippet.
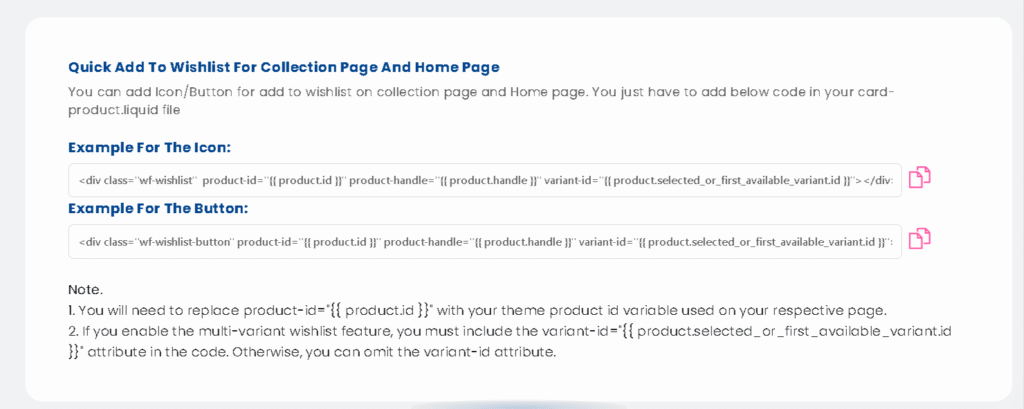
Step 04: Add the following custom code snippet at the appropriate location (where you want to show your icon/button) within the “card-product” file:
Example for the Icon:
<div class="wf-wishlist"  product-id="{{ product.id }}" product-handle="{{ product.handle }}" variant-id="{{ product.selected_or_first_available_variant.id }}"></div>
Example for the Button:
<div class="wf-wishlist-button" product-id="{{ product.id }}" product-handle="{{ product.handle }}" variant-id="{{ product.selected_or_first_available_variant.id }}"></div>
Note* : Depending on your theme you might have to modify the above code slightly. As data-productID is different in different themes. So in place of product.id you can put your Product ID
Note* : Don’t forget to save your settings after adding these code snippets to your files.
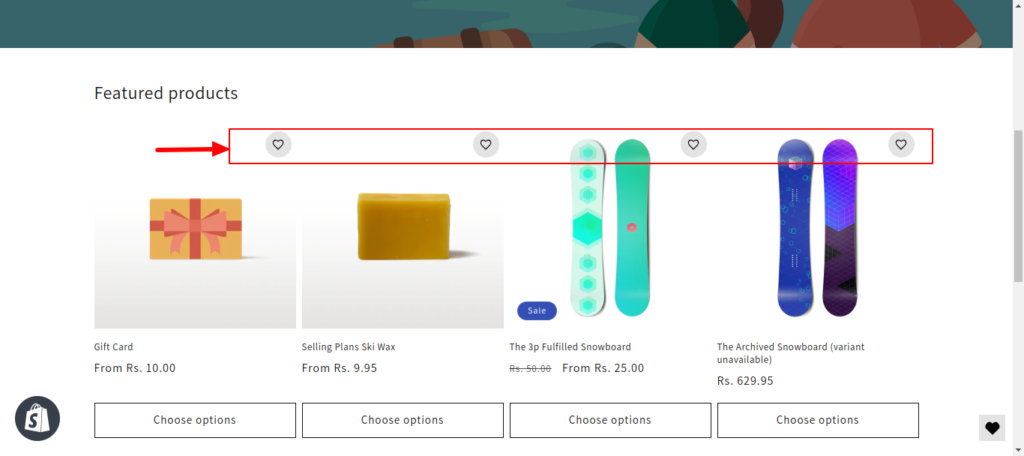
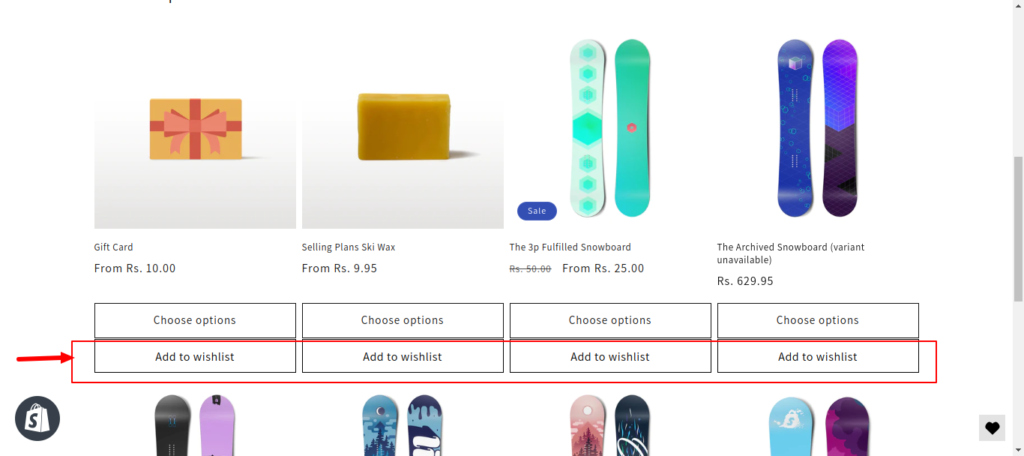
Congratulations! Your wishlist icon/button is now positioned exactly where you want it to be.
We can also do this customization for you on our end if you do not have any coding background just reach us out at support@webframez.com


