
Quick Answer #
To add a Wishlist tab to the Shopify customer account menu using Wishlist Guru, go to Content > Menus > Customer account main menu and add a “Wishlist” menu item linked to WishlistGuruUI. Then go to Settings › Checkout › Edit your configuration, open the Apps panel in the Checkout Customizer, click “+”, next to WishlistGuruUi, select “Add page to Accounts,” and save.
When customers log into your Shopify store, their account page is the natural home for everything personal—orders, profile, and their wish list. By adding a Wishlist tab to the customer account main menu, you give shoppers a seamless, one-click way to revisit saved products, enabling them to purchase when they’re ready.
This guide walks Shopify merchants through the complete two-step process of enabling the Wishlist Guru customer account extension using Shopify’s built-in menu editor and the Checkout Customizer.
Why Add a Wishlist Tab to the Account Menu? #
Most wishlist apps display a floating button or a separate landing page. But the highest-converting placement is inside the customer account navigation — because that’s where logged-in, high-intent shoppers already look.
Drive repeat purchases: #
Customers revisit saved items and buy when they’re ready — no need to search again.
Improve account engagement: #
A richer account page gives shoppers more reasons to log in and stay longer.
Enable wishlist email alerts: #
Customers can opt in to back-in-stock and price-drop alerts directly from their account.
Centralized experience: #
Orders, profile, and wishlist — all in one place. Clean and frictionless for shoppers.
Step 1—Add “Wishlist” to the Customer Account Main Menu #
The first step is to add a Wishlist menu item to Shopify’s customer account main menu and point it to the Wishlist Guru app extension. This creates the navigation tab customers will see when they log into their account.
Open the Customer account main menu #
- In your Shopify admin, click
Contentin the left sidebar. - Click
Menusfrom the submenu. - Find and click
Customer account main menu. You’ll see the default menu items: Orders and Profile.

Add the Wishlist menu item #
- Click
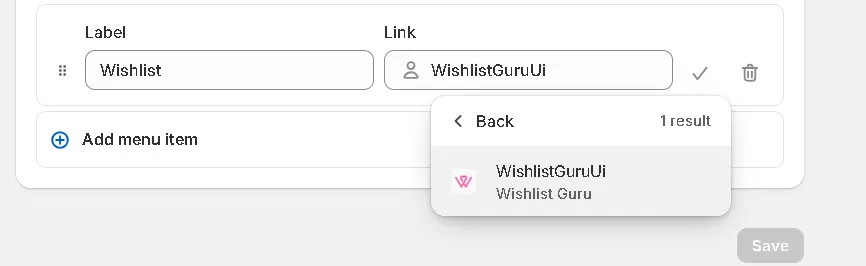
+ Add menu itemat the bottom of the menu list. - In the Label field, type
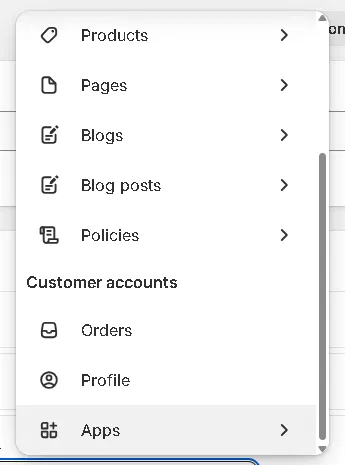
Wishlist. - Click the Link field and scroll down
Customer accountsin the dropdown. Then clickApps. - Select
WishlistGuruUifrom the Wishlist Guru section (1 result will appear). - Click the checkmark ✓ to confirm, then click
Save.
Note: The link must be set to WishlistGuruUi (under Apps › Customer accounts). Using a regular URL will not render the wishlist app block correctly.
Step 2 — Add the WishlistGuruUi Block via the Checkout Customizer #
Adding the menu item alone isn’t enough. You also need to add the WishlistGuruUi app block to your customer account page through Shopify’s Checkout Customizer. This is what actually renders the wishlist interface when customers click the Wishlist tab.
Open the Checkout Customizer #
- In Shopify Admin, go to
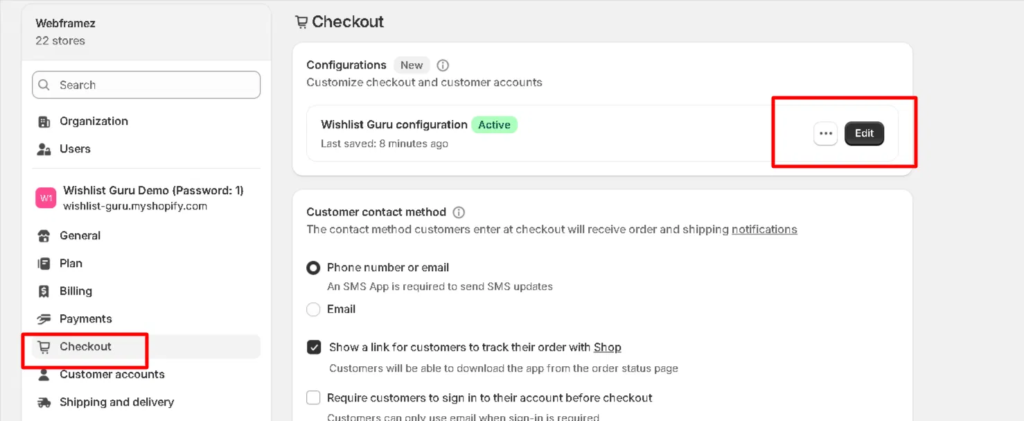
Settingsthe bottom-left gear icon. - Click
Checkoutin the left panel. - Under Configurations, find your active checkout configuration (marked Active) and click
Edit.
Add the WishlistGuruUi app block to the account page #
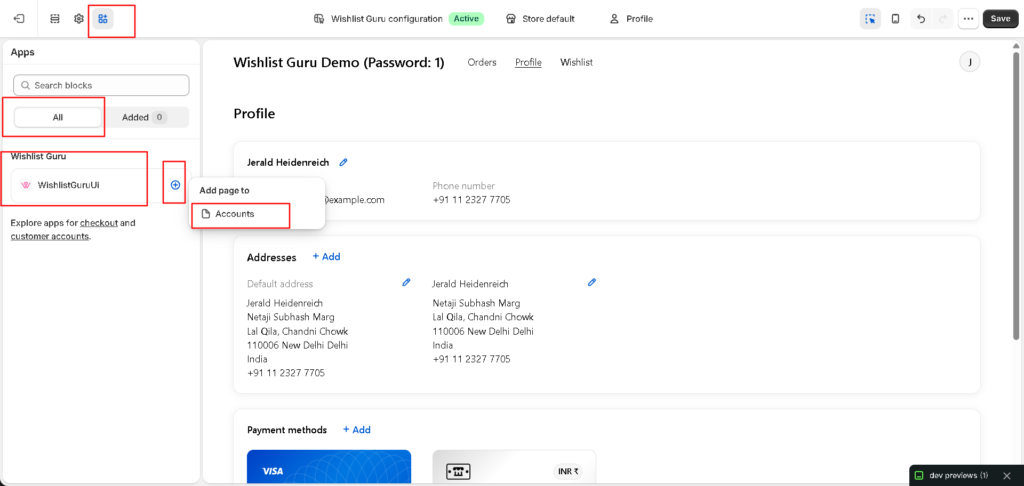
- In the Checkout Customizer editor, click the Apps icon (grid/blocks icon) in the top-left toolbar to open the Apps panel.
- Under the Wishlist Guru section, you’ll see
WishlistGuruUi. Click the+icon next to it. - A popup will appear with the option “Add page to.” Click it.
- Click
Savein the top-right corner of the customizer.
TIP: If you don’t see the Appspanel icon, make sure you’re in the correct editor tab. Look for the icon that looks like four small squares (a grid) in the top-left of the Checkout Customizer.
What Customers Will See After Setup #
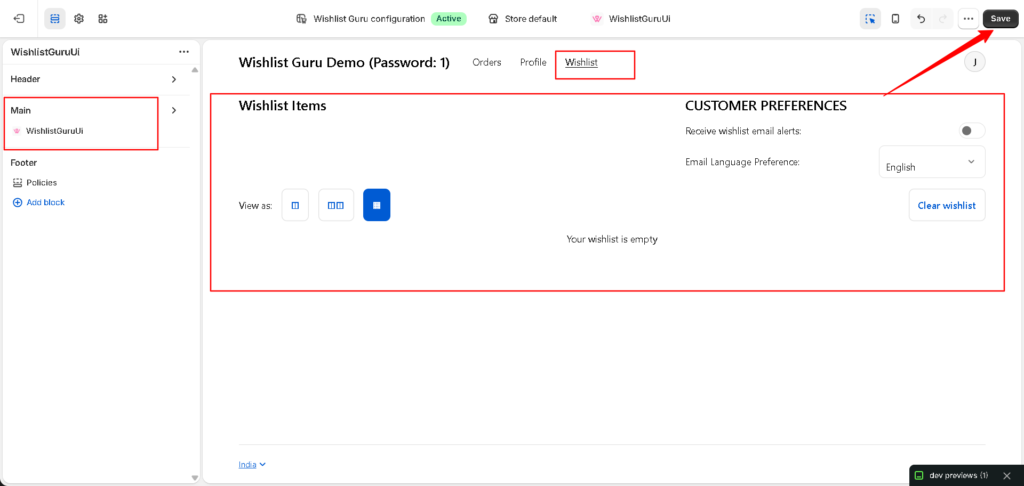
Once both steps are complete, logged-in customers will see a Wishlist tab in their account navigation alongside Orders and Profile. Clicking it opens a full wishlist management page with:
- Wishlist Items — all saved products with grid/list view options
- Customer Preferences—toggle for wishlist email alerts and email language preference
- Clear Wishlist — option to reset the wishlist in one click
Check this in action #
Frequently Asked Questions #
Why should I add a wishlist tab to the account menu?
Adding a Wishlist tab gives your logged-in customers a dedicated, easy-to-find place to manage their saved products. It keeps shoppers engaged with your store between browsing sessions and is proven to increase repeat purchase rates by reducing friction when a customer is ready to buy.
Does this work with Shopify’s new customer accounts?
Yes. Wishlist Guru’s WishlistGuruUi extension is purpose-built for Shopify’s new customer accounts (also known as “Shop” accounts). If you’re still using legacy customer accounts, you’ll need to migrate first — Shopify provides a migration guide in your admin under Settings › Customer accounts.
Do I need to do both steps, or just one?
Both steps are required. Step 1 (adding the menu item) creates the navigation tab customers can click. Step 2 (adding the app block via the Checkout Customizer) renders the actual wishlist content on that page. Without Step 2, the Wishlist tab will appear in the menu, but the page will be empty.
Can customers receive wishlist email alerts after this setup?
Yes! Once the Wishlist tab is live, customers can visit their account’s Wishlist page and toggle “Receive wishlist email alerts” on or off. They can also select their preferred email language from the dropdown in the Customer Preferences panel.
Will this affect my checkout or other account pages?
No. Adding the WishlistGuruUi block only affects the dedicated Wishlist account page. Your checkout flow, Orders page, and Profile page remain completely unchanged.
I can’t find “Customer account main menu” under Menus. What should I do?
The Customer account main menu only appears if you have Shopify’s new customer accounts enabled. Go to settings. › Customer accounts and make sure “New customer accounts” is selected. If the menu still doesn’t appear, contact Shopify support to ensure new accounts are correctly activated on your store.


