Give your customers the flexibility to save products exactly where it feels natural. With Wishlist Guru, you can easily display the wishlist icon on different areas of your product page—helping improve engagement and conversions.
Steps to Configure Wishlist Button Placement: #
- Go to the Dashboard page
- Scroll down and locate “Add to Wishlist Button Appearance”
- Click on the Configure button
- Choose where you want to display the wishlist button:
- Product image
- Beside product title
- Beside Add to Cart button
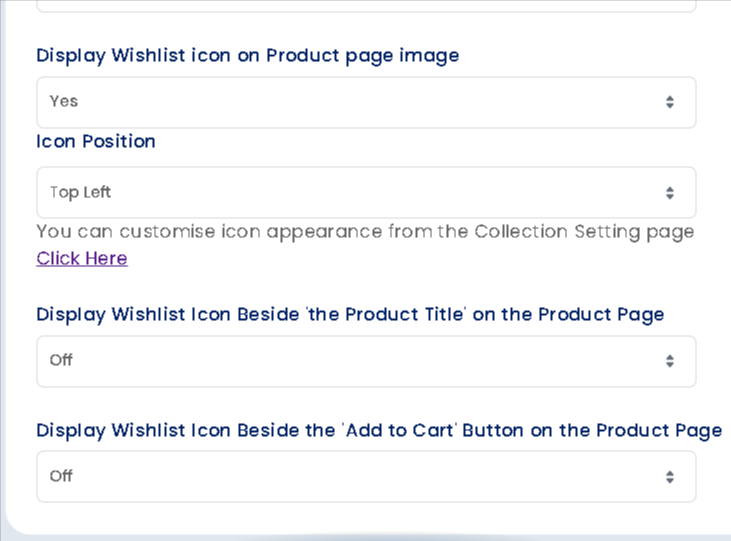
Display Wishlist Icon on Product Image: #
You can enable or disable the wishlist icon directly on the product image.
Options:
- Yes
- No
Icon Position:
- Top Left
- Top Right
- Bottom Left
- Bottom Right
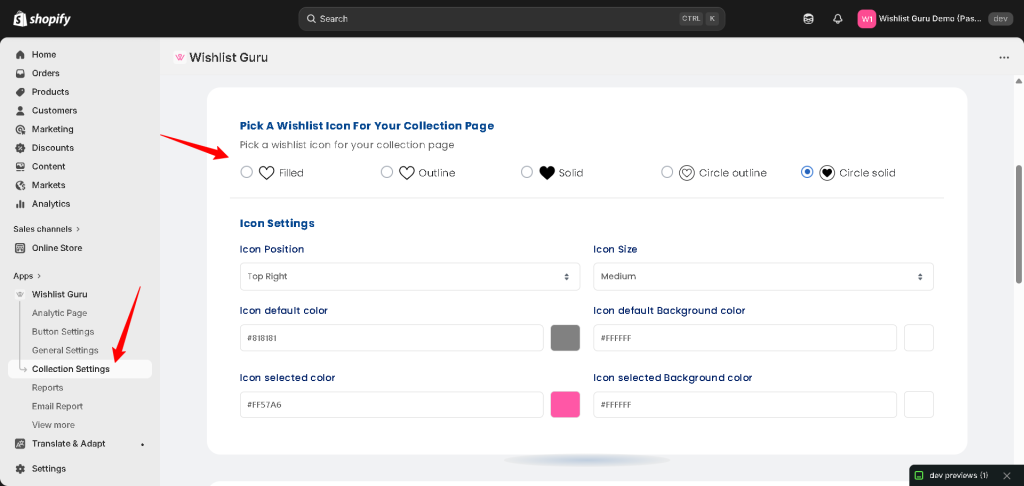
👉 You can customise icon appearance from the Collection Setting page.
Display Wishlist Icon Beside Product Title #
You can show the wishlist icon next to the product title for a clean and minimal layout.
Options:
- Left side of the title
- Right side of the title
- Off
👉 This works best if you want a subtle, non-intrusive design.
Display Wishlist Icon Beside Add to Cart Button #
You can place the wishlist icon near the Add to Cart button to target high-intent users.
Options:
- Left side of the cart button
- Right side of the cart button
- Off
👉 This placement is highly effective for improving conversions, as customers can save products right before purchasing.
Note:- The wishlist icon shown on the product page follows the same design as your collection page. To modify the icon style or appearance, simply update it from the collection page settings.